DIY Felt Pouch

Do you need a coin pouch or something to hold your sunglasses? Would you like to make a present for a friend for Valentine's Day?  Follow the instructions below or attend our DIY Pouch program at the Gilroy library on Saturday, January 22, 2022 from 2-3 pm. Please register for the in-library program at DIY Pouches event. You provide the creativity, and we will provide the supplies! Update: This event has now ended.

If you can't attend the Gilroy library event, here are some DIY pouch project instructions including some basic stitch guides below:

Cell Phone Changing Pocket

  • Cut two large rectangles 4" X 9" and one small rectangle 4" X 5".
  • Cut a hole near the top of the large rectangles to go over the plug in the wall.
  • Sew a whipping stitch around the hole.
  • Add an embellishment to the small rectangle if you wish.
  • Sew a blanket stitch across the top of the small rectangle.
  • Pin bottom and sides of the small rectangle to the large rectangles.
  • Sew a blanket stich around the whole outer edge of the pinned pieces.


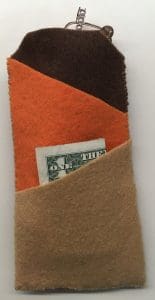
Sunglass Holder Plus Pockets for Money and Library Card

  • Cut two large rectangles 3 1/2" X 6 1/2" (or dimensions to hold your glasses).
  • Cut two more pieces of felt of contrasting colors with the top edge cut at an angle to hold small items.
  • Pin all four pieces of felt together with the bottom edge and sides lining up.
  • Use a whipping stitch around the outside to hold all the layers together.  Make sure to stitch through all four layers of felt.

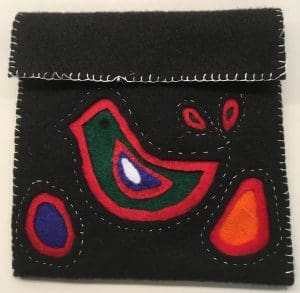
Coin Pouch Using Different Layers of Felt for Design

  • Cut a large rectangle 5 1/2" x 11 1/2" in a dark color.
  • Make a stencil of a bird or other design.
  • Cut two pieces of felt of contrasting colors at least 1/2" larger that the stencil.
  • Leave 1+" at the top of the large rectangle.  Pin the two piece of felt to the back side of the large rectangle.
  • Pin the stencil on the front of the rectangle above the two pieces of felt.
  • Make a running stitch 1/4" from the stencil to form the bird shape.  Make sure to stitch through all three layers of felt.
  • Carefully cut the first layer of felt 1/4" inside the running stitch.
  • Carefully cut the second layer of felt 1/2" inside the running stitch.
  • Cut a wing out of three colors of felt.  Cut the second piece 1/4" smaller than the first piece and the third piece 1/3" smaller than the second piece.
  • Sew the upper two layers of felt to the largest piece of the wing.
  • Sew the large piece of wing to the inside of the bird.
  • If desired, cut more contrasting shapes and colors to make a more detailed design.
  • Fold the large piece of felt over to make a pouch.  Determine where to put the Velcro fasteners.
  • Pin the pouch in place.  Use a blanket stitch to sew around the other edges.  Make sure to stitch through the two layers of felt.

Pouch with Band to Hold Flap in Place

  • Cut a rectangle 6" X 12 ".  Round the edge on one of the narrow sides.
  • Cut a band 2" X 6". 
  • Embroider some flowers and leaves in the middle of the band.
  • Sew a blanket stitch on the long edges of the band.
  • Fold main rectangle up to 1/3 of length to make a pouch.  Keep the rounded edge at the top.  Pin into place adding the decorated band in the middle.
  • Stitch a blanket stitch around the outside.  Make sure to stitch through all the layers of felt.
  • Fold the flap under the band.  Add a Velcro fastener to keep flap closed.  The second piece of Velcro will be under the band.

How to Make a Running Stitch

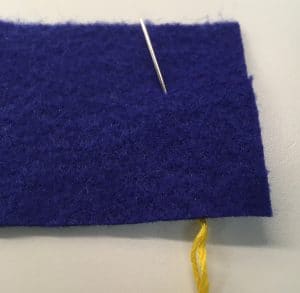
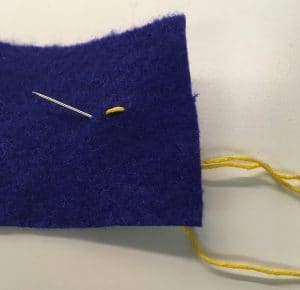
Thread a needle and knot one end.  Bring the needle up through the felt that will be inside (to hide the knot).
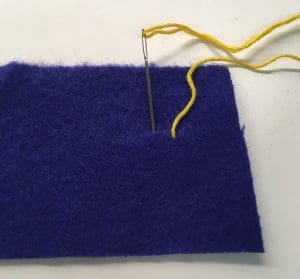
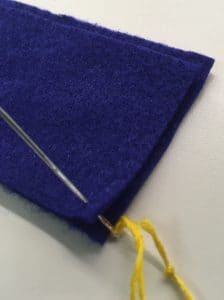
Bring the needle down 1/4" from the other thread.
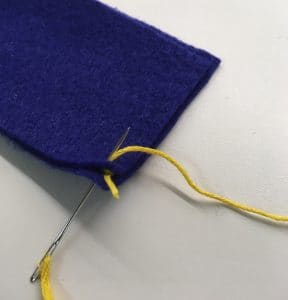
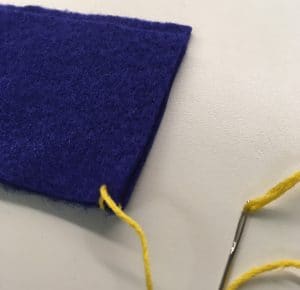
Repeat by bringing the needle up 1/4" from the other thread.  Continue until done.  Make a knot on the inside piece of felt to hide the knot.

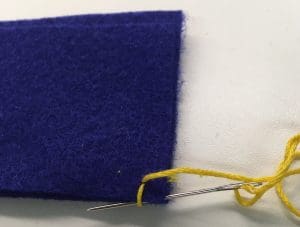
How to Make a Whipping Stitch

Thread the needle and knot one end.  Start with the needle between the two pieces of felt to hide the knot.  Bring the needle up through the top layer of felt.
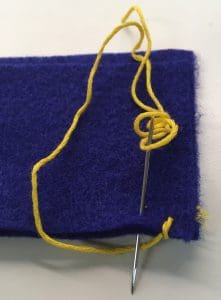
Bring the needle up starting from the lower layer of felt, through both layers, and through the first hole.
Bring the thread down.  Start the next stich at the same hole at the lower layer of felt. 
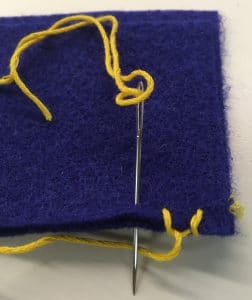
Angle the needle so the tip of the needle come up about 1/4" from the first hole on the top layer.  
Keep repeating by starting the needle on the bottom layer corresponding to the top thread.  Have the needle go up at an angle to be 1/4" from the top thread.  Continue until done.  Make a knot between both layers to hide the knot.

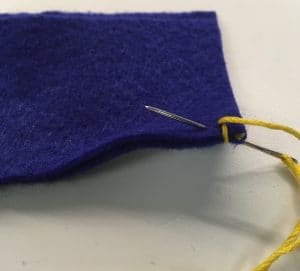
How to Make a Blanket Stitch

Thread the needle and knot one end.  Start with the needle between the two pieces of felt to hide the knot.  Bring the needle up through the top layer of felt.
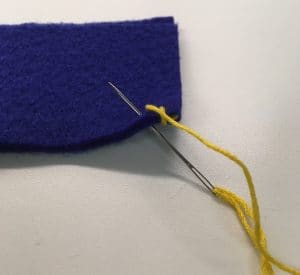
Bring the needle up starting from the lower layer of felt, through both layers, and first hole to make a loop.
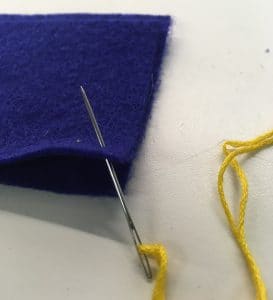
Tighten stitch.  Bring the needle inside the loop.
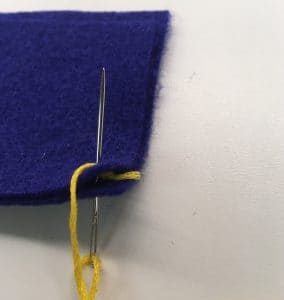
About 1/4" from the first hole, bring the needle down from the top layer through the bottom layer.  Make sure to keep the main thread under the needle.  Tighten.
Repeat bringing the needle down through the top and bottom layers.  Keep the main thread under the needle.  Continue until done.  Make a knot between both layers to hide the knot.

For additional ideas of pouches and embellishments, check out these books:


View Full List